Installing the app
- As a Salesforce Admin, log in to your Salesforce account.
- In the Salesforce App Exchange, search for 'Lumin Sign'.
- Click Get it now to complete the installation.
- To trial Lumin Sign, select Try it (This requires a Salesforce Sandbox account).

- To trial Lumin Sign, select Try it (This requires a Salesforce Sandbox account).
- Log in to your Salesforce account to start the installation.
-
Choose your installation preference:
-
Install for Admins Only
-
Install for All Users
-
Install for Specific Profiles
-
- Click Install.
- When prompted, check the box to Grant access to Lumin (required for data syncing) and click Continue.

Activating the Integration
- Create a Lumin account here. You can use your Google or Microsoft credentials, or your email and a password.

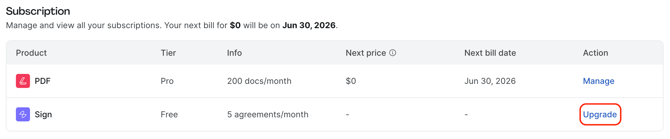
- In Lumin, head to Settings, then Billing to upgrade your Lumin Sign account to Pro.
- Under Subscription and in Action, click Upgrade to purchase, add or manage Lumin Sign licenses.
- At the checkout:
- Select Monthly as the billing cycle.
- Add one seat.
- Then, add the promotion code 'SFLUMIN14'

- Review the details of the upgrade in the Summary section.
- Finally, click Pay now to complete the upgrade.
- In Salesforce, assign the appropriate permissions to the users:
User Role Required Permission Sets Admins Lumin Admin, Lumin Site Guest User, Lumin User Standard Users Lumin Site Guest User, Lumin User - As a Salesforce Admin, from the app launcher, open the Lumin Sign app.
- Navigate to the Lumin Admin tab.
-
Click Register OAuth Client.

- Then, select Authorize Admin.

-
Log in to Lumin if prompted, select the Workspace containing your templates.
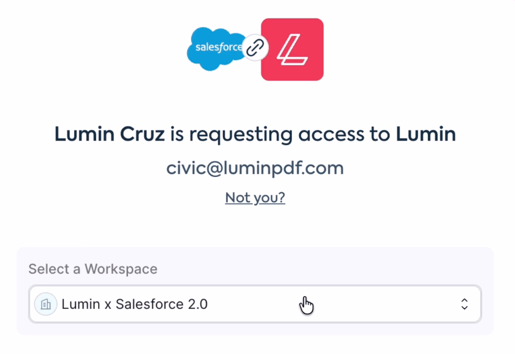
- Then, click Allow Access.
Configure the webhook
Site setup
To receive real-time updates when a document is signed, you must configure a Salesforce Site.
-
In the Lumin Admin tab, refer to Step 2 for the specific configuration values.
-
Go to Setup > Sites.
-
Create a new site with these details:
-
Site Label:
Lumin Webhook -
Site Name: (Auto-populates)
-
Active: Check this box.
-
Active Site Home Page:
InMaintenance -
Site Template:
SiteTemplate
-
-
Click Save.
Finalize site security
-
On the Site details page, click Public Access Settings.
-
Click Assigned Users, then select Lumin Webhook.
-
Go to the Permission Set Assignments tab and click Edit Assignments.
-
Find Lumin Site Guest User, move it to Enabled Permission Sets, and click Save.
Link the webhook & complete registration
To ensure Salesforce receives real-time status updates, you must register the Webhook URL in your Lumin settings and finalize the registration in Salesforce.
-
In Salesforce, go to the Lumin Admin tab and Copy the generated Webhook URL.
-
Log in to your Lumin account and navigate to Settings > Developer Settings.

-
Under the Account Callback section, paste the Webhook URL and click Save.
-
Return to the Lumin Admin tab in Salesforce.
-
Under Step 2 (Site Settings Configuration), click the Update DCR Registration button.
TIP: Clicking Update DCR Registration synchronizes your Salesforce Site with Lumin’s backend, ensuring that document status updates (like “Signed” or “Declined”) flow back into your CRM automatically.
Add Components to page layouts
Finally, add the Lumin interface to your records (e.g., Accounts, Leads, or Opportunities).
-
-
Navigate to a record (e.g., an Account).
-
Click the Gear Icon in the top right and select Edit Page.
-
From the Components list on the left, find and drag these onto your page:

-
Lumin - Document Actions
-
Signature Request Related List
-
-
Click Save and Activate.
-